SET DE PINCEAUX POUR GOUACHE
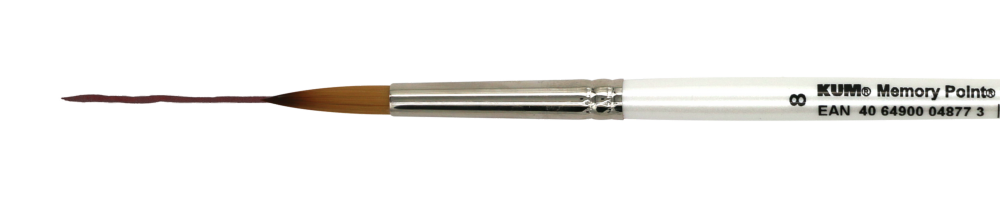
MEMORY POINT RONDE - TAILLE 8
Un pinceau polyvalent doté d’une excellente élasticité, qui conserve sa pointe fine pour les grands traits comme pour les détails précis. Il reprend sa forme initiale en toute fiabilité, assurant précision et contrôle à chaque application.
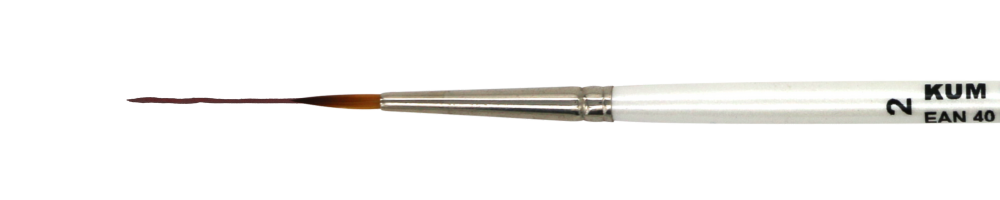
MEMORY POINT RONDE -TAILLE 2
La petite pointe ronde offre une précision et une flexibilité exceptionnelles, parfaites pour ajouter des détails complexes, des lignes fines et de petits accents. Elle contient juste la bonne quantité de peinture pour des traits nets et réguliers.
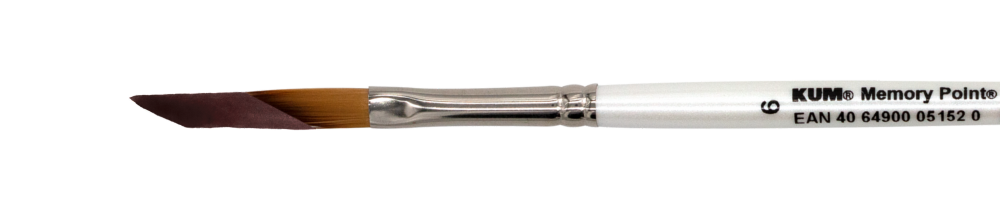
MEMORY POINT INCLINÉ - TAILLE 6
Sa forme inclinée offre un contrôle précis et une grande polyvalence, ce qui le rend parfait pour traiter les bords tranchants, superposer les couches et couvrir de grandes surfaces. Son excellente absorption de la peinture garantit une application lisse et sans trace.
Essential Gouache – Your Comprehensive Guide to Gouache Painting
Why Gouache? The Unique Characteristics of This Medium
Gouache is a highly versatile painting medium that combines the best of both watercolor and acrylic. It is water-based, like watercolor, but offers opaque coverage, similar to acrylic paint. This allows for layering light colors over dark and creating bold, vibrant illustrations. Unlike watercolor, which relies heavily on transparency, gouache enables both soft gradients and solid color applications.
This medium is particularly favored by illustrators, designers, and fine artists due to its flexibility, quick drying time, and re-wettable nature. Whether you want to create smooth blends, expressive brushstrokes, or detailed illustrations, gouache gives you the freedom to experiment.
What You Will Learn in This Guide
This guide is designed to give you a strong foundation in using gouache. You will learn:
• How to control water-to-paint ratios for different effects
• Essential brush techniques for smooth application and details
• Layering methods to create depth and texture
• How to mix and blend colors effectively
• Common mistakes and how to fix them
By the end of this guide, you will have the confidence to paint simple compositions and experiment with your own style.
First Steps: Expectations and Patience
Like any new medium, gouache requires practice and patience. It behaves differently from both watercolor and acrylic, so don’t be discouraged if your first attempts don’t look perfect. The key is to experiment, understand how the paint interacts with water and paper
1. Understanding Your Essential Gouache Brushes
For gouache painting, the right brushes make a significant difference in achieving both precision and expressive strokes. This set includes three Memory Point brushes, each chosen for their specific strengths in gouache painting:
• Round Brush Size 8 – A versatile brush perfect for washes, broad strokes, and soft blending. The pointed tip also allows for some finer details.
• Round Brush Size 2 – Ideal for detailed work, line work, and adding final touches. Its fine point offers excellent control.
• Slanted Brush Size 6 – A great choice for bold strokes, sharp edges, and smooth gradients. The angled shape makes it easy to create both broad and fine strokes.
The Memory Point brushes are designed to hold a good amount of paint while maintaining their shape, making them excellent for the layering and blending techniques required in gouache painting.
Gouache Paints: Tubes vs. Pans, Artist vs. Student Quality
Gouache is most commonly found in tubes rather than pans. The paint from tubes is more vibrant, easier to rehydrate, and allows for a smoother application. While some brands offer gouache in pans, they tend to dry harder and may require more effort to reactivate.
When choosing gouache, you’ll also encounter two quality levels:
• Student Grade: More affordable but contains less pigment and more binder, which can lead to weaker colors and chalkier textures.
• Artist Grade: Higher pigment concentration, smoother consistency, and richer colors that remain vibrant even when dry.
For the best results, artist-grade gouache is recommended, especially when practicing layering techniques.
Types of Paper and Their Properties: Cold-Pressed vs. Hot-Pressed
Unlike watercolor, which relies on the transparency of paint interacting with textured paper, gouache works well on a variety of surfaces:
• Cold-Pressed Paper: Slight texture, holds water well, and is great for a balance between smooth blending and texture.
• Hot-Pressed Paper: Very smooth surface, ideal for fine details, illustrations, and controlled applications.
• Mixed Media Paper: A good alternative if you want a smoother surface without using traditional watercolor paper.
• Illustration Board: Preferred by many gouache artists for its durability and ability to hold multiple layers.
Additional Useful Materials
• Palette: Gouache works best when mixed on a smooth surface like a ceramic or plastic palette.
• Water Jars: One for cleaning brushes and one for fresh water to control consistency.
• Paper Towels or a Rag: Essential for controlling moisture in your brush and correcting mistakes.
• Masking Tape: Helps create clean edges and secure paper while painting.
Having the right materials ensures a smoother learning experience and helps you get the best results from your gouache paintings.
2. Basic Gouache Techniques
Mastering gouache requires understanding its unique properties—while it shares similarities with watercolor and acrylic, it has distinct characteristics that influence how you apply it. Below are the essential techniques to get you started.
Opaque Application: The Power of Gouache
Unlike watercolor, gouache is naturally opaque. You can apply it in solid, flat layers to create bold, vibrant colors. For best results:
• Use minimal water to keep the paint creamy and opaque.
• Apply in even strokes, avoiding excessive layering in one go to prevent reactivating lower layers.
• If a layer dries too streaky, apply another coat once it’s fully dry.
Layering and Adjustments
Gouache dries quickly but remains water-soluble. This allows you to:
• Paint over mistakes or adjust colors easily.
• Add highlights and details without worrying about transparency.
• Use light over dark—unlike watercolor, you can apply white or lighter colors on top of dark layers.
Let each layer dry fully before adding more paint to avoid muddying the colors.
Blending and Soft Transitions
Gouache can be blended like oils or acrylics but dries quickly, so work efficiently:
• For soft transitions, blend colors while still wet using a damp brush.
• To reactivate dry paint slightly, use a brush with a small amount of clean water and gently work over the edges.
• Use a slanted brush for smooth, gradient effects.
Dry Brush Technique
A dry brush technique adds texture and interest to paintings:
• Use a barely damp brush with thick paint.
• Drag the brush lightly over textured paper to create a broken, textured stroke.
• Ideal for foliage, rough surfaces, and expressive brushwork.
Scumbling: Creating Atmospheric Effects
Scumbling is a technique where a light, dry layer of paint is dragged over an underlying color to create a hazy, soft effect. This works well for:
• Misty landscapes.
• Light diffusion in atmospheric scenes.
• Subtle texture variations.
Mixing with Water: Finding the Right Consistency
Gouache can be used thick and opaque or thin and translucent. Understanding consistency helps in different applications:
• Thick & Opaque (Creamy Consistency): Straight from the tube with little water—ideal for solid coverage.
• Mid-Opacity (Milk Consistency): Slightly diluted with water—great for controlled blending.
• Thin & Translucent (Ink Consistency): Very diluted—mimics watercolor effects but remains more vibrant.
Being able to shift between these consistencies makes gouache incredibly versatile!
3. Water & Paint Control
Controlling water and paint consistency is crucial in gouache painting. Unlike watercolor, gouache allows for both transparent and opaque applications, but it requires careful handling to maintain its vibrancy and texture.
How Much Water is Too Much or Too Little?
Since gouache is water-activated, the amount of water you use significantly affects the outcome:
• Too much water → Paint becomes too thin, losing its opacity and vibrancy. It may also cause paper buckling.
• Too little water → Paint may feel dry and streaky, making blending difficult.
• Just the right amount → Smooth application with rich, vibrant color.
Start with a creamy consistency and adjust as needed. A slanted brush (size 6) helps maintain control when working with different consistencies.
Finding the Right Pigment-to-Water Ratio
The ideal ratio depends on the effect you want:
• Opaque Layers (Creamy) → Minimal water, almost straight from the tube. Great for solid coverage and adding details.
• Soft Blending (Milk-Like Consistency) → Slightly thinned paint for smoother transitions and gradients.
• Thin Layers & Washes (Ink-Like Consistency) → More diluted, mimicking watercolor effects.
Experiment with each consistency to understand how they behave.
Avoiding Common Mistakes
Even experienced painters sometimes struggle with water control in gouache. Here’s how to prevent common issues:
1. Muddy Colors → Happens when too much water is used while layering. Let the first layer dry before applying a new one.
2. Streaky Application → Caused by too little water. Add a small amount of water to smoothen the paint.
3. Reactivating Dry Layers Unintentionally → Avoid excessive brushing over dried layers unless intentionally blending. Work in decisive, confident strokes.
4. Paper Warping → Use thicker paper (at least 250-300gsm) and avoid oversaturating it with water.
Understanding these principles will help you gain better control over gouache and improve your painting process.
4. Exercises for Beginners
Practicing basic exercises will help you get comfortable with gouache and understand how it behaves on paper. These exercises focus on brush control, layering, and blending techniques to build a solid foundation.
Simple Brush Exercises
Start with basic strokes to get familiar with how each brush in your set behaves:
• Thin & Thick Lines (Round Brushes, Size 8 & 2) → Practice applying different pressure to create varied line thickness.
• Flat Strokes (Slanted Brush, Size 6) → Use the full width of the brush for even coverage and controlled edges.
• Dry Brush Technique → Load a small amount of thick paint on a dry brush and drag it across textured paper to create rough, expressive marks.
• Circular & Dot Strokes → Use the tip of the round brush to make controlled dots and small details.
Water & Paint Control Practice
Understanding paint consistency is key to mastering gouache. Try these exercises to improve your control:
• Opacity vs. Transparency → Paint a simple shape (like a square) using different amounts of water to see how it changes from opaque to translucent.
• Blending Two Colors → Place two different colors next to each other and use a slightly damp brush to blend them smoothly in the middle.
• Soft vs. Hard Edges → Paint a shape with wet gouache and use a damp brush to soften the edges. Then, paint the same shape and let it dry before adding a new color next to it for a crisp, hard edge.
Building Depth & Layering
Since gouache allows for layering, these exercises will help you control depth:
• Layering Light Over Dark → Paint a dark background and, once dry, add a lighter shape on top to test opacity.
• Layering Dark Over Light → Start with a light wash, let it dry, then add a darker color on top to see how gouache covers previous layers.
• Gradual Layering → Paint a simple shape and build layers gradually to add dimension.
Texture & Detail Exercises
• Dry Brush Texture → Drag a dry brush with thick paint across rough paper to create a textured effect.
• Stippling & Cross-Hatching → Use the tip of the round brush to create soft, grainy textures or fine lines for shading.
• Smooth Washes vs. Textured Strokes → Experiment with both controlled washes and expressive brushstrokes to understand different finishes.
By practicing these exercises regularly, you’ll gain confidence and precision, preparing you for more complex paintings.
5.First Small Projects
Now that you’ve practiced the basics, it’s time to apply your skills to small projects. These exercises will help you gain confidence in handling gouache and understanding its full potential. Each project focuses on different aspects of gouache painting, such as blending, layering, and texture.
Sky & Landscape Studies
Gouache is great for painting landscapes due to its ability to layer and correct mistakes. Try these simple exercises:
• Soft Gradient Sky → Use the slanted brush (Size 6) to blend a smooth transition from dark to light, mimicking a sunset or dawn.
• Clouds & Atmosphere → Paint a solid blue sky with a round brush (Size 8), then use a damp brush to lift out soft cloud shapes.
• Mountains & Hills → Start with simple silhouettes, layering darker tones in the foreground for depth.
Floral Motifs & Nature Elements
Gouache works beautifully for botanical elements due to its opacity and ability to refine details.
• Basic Leaves & Stems → Use the round brush (Size 8) for fluid strokes and switch to the smaller round brush (Size 2) for fine details.
• Simple Flowers → Paint petal shapes with a mix of light and dark tones to create depth. The slanted brush (Size 6) works well for precise petal edges.
• Mushrooms, Ferns & Small Botanicals → Play with different brush shapes to capture organic textures.
Urban Gouache Basics
For those interested in urban scenes, these projects help with perspective and structure:
• Doors & Windows → Use the round brush (Size 8) for bold base shapes and the smaller brush (Size 2) for fine details like windowpanes.
• Simple Rooftops & Buildings → Block in flat colors and add shading for depth.
• Street Lamps, Trees & Pathways → Combine controlled and loose brushstrokes to suggest movement and depth.
Creative Freestyle Techniques
Experimenting with gouache’s unique properties will help you explore your artistic style. Try these fun techniques:
• Gouache & Water Texture → Paint a layer and sprinkle water droplets to lift some paint, creating interesting textures.
• Splattering & Dry Brush Effects → Use the round brush (Size 8) to flick paint for a splattered effect, or use a dry brush to create rough textures.
• Mixed Media Experimentation → Combine gouache with colored pencils, pastels, or ink for unique effects.
These projects will allow you to practice essential techniques while having fun. Ready to take it further? Let’s explore how to sketch and build a finished piece in the next section.
6.From Sketching to Finished Artwork
Once you’ve practiced with smaller exercises and projects, it’s time to put everything together and create a complete gouache painting. This section covers the steps involved in taking a sketch and turning it into a polished, finished piece.
Transferring a Sketch to Gouache Paper
• Freehand vs. Tracing:
While you can sketch freehand directly onto your gouache paper, it’s perfectly fine to use a lightbox or graphite transfer method to get your composition right. Keep your initial lines light so they don’t show through the paint later.
• Consider Composition & Proportions:
Before you start painting, make sure your sketch is well-placed on the paper. Consider how the elements are arranged, ensuring balance and proportion.
• Simplify Your Sketch:
Gouache allows you to correct mistakes and refine your design as you go, so don’t worry about making it perfect at first. Focus on capturing the basic shapes and overall structure of your subject.
The Right Painting Order: Light to Dark
Gouache works similarly to watercolor in that you’ll want to start painting light areas first and gradually move to darker tones. This method will help maintain the transparency of lighter washes, while giving you control over shadows and highlights.
• Layering for Depth:
Start by blocking in large shapes and areas of color with your slanted brush (Size 6). Allow these areas to dry before adding more layers. Use your round brush (Size 8) for smooth transitions and your smaller round brush (Size 2) for details.
• Building Up Contrast:
Once the first layer has dried, begin adding depth to your painting. Use darker tones for shadows and highlights to make elements pop. The round brush (Size 8) is perfect for covering larger areas of dark, while the round Size 2 or slanted Size 6 are ideal for precise work.
• Dry Brushing & Final Touches:
Once you’ve built up the layers and contrast, you can add textural details using dry brushing techniques with the smaller brushes. This adds final definition and dimension to your piece.
Patience is Key: Waiting for Drying Phases
One of the essential aspects of gouache is its ability to layer and correct mistakes. However, this requires patience. Allow each layer to dry completely before adding new layers to avoid muddying the colors. You may also use a hairdryer on a low setting to speed up drying time between layers if necessary.
7.Inspiration & Tutorials
As you continue to explore gouache, it’s important to stay inspired and keep improving your skills. Here are some ways to continue growing as an artist:
Developing Your Personal Style
• Experiment with New Subjects:
Keep pushing the boundaries of your creativity. Try painting different subjects and experiment with abstract ideas or portraiture. The more you experiment, the more you’ll refine your personal style.
• Look for Inspiration Everywhere:
Art is everywhere—take inspiration from nature, architecture, still life, and even photographs. By observing your surroundings closely, you’ll find new ideas for compositions and color schemes.
Artists & Inspirations: Learning from the Masters
• Study Other Artists:
Explore the works of gouache artists and other mediums to learn different techniques and approaches. Don’t be afraid to mimic their methods while making them your own.
• Exhibitions & Galleries:
Visit art exhibitions and galleries (both in person and online) to discover how other artists approach gouache and other mediums.
Use Templates:


